Consider hiring an arborist like Kyle Tree Service if you have a tree that needs to be removed from your property. They can assess the tree and determine if it is structurally unsound or near a power line.
If so, they will plan a safe removal. There are several things to keep in mind when preparing for this process.
Tree removal is risky and can harm the homeowner and family if improperly performed. Professionals have the tools and training to do the job quickly and safely. They also understand local regulations and follow established guidelines to prevent accidents and injury. Homeowners should always choose licensed professionals when hiring a tree service. It may cost a little more upfront, but it will save you from expensive damages caused by unlicensed contractors in the long run.
Safety precautions like wearing protective gear, marking off work zones, and not working near power lines are essential for the crew to stay safe and avoid potential accidents. A hard hat, gloves, and goggles are all must-haves when performing this type of work. Gloves help protect the hands from injuries and wood chips, while the goggles keep dust, dirt, and sawdust out of the eyes. The hard hat protects the head from possible concussions.
Before removing a tree, the team will inspect it for any damage that could cause an accident. This includes checking for rotten or dead limbs, insect infestations, and structural weaknesses such as cracks in the trunk. In addition, they will look for any power lines near the tree and ensure they are safely away from it.
If the team notices these hazards, they notify the homeowner before beginning work. Depending on the severity of the danger, the team may need to delay the process or use other means to ensure their safety. This can add to the overall time required to perform the job.
If a tree on your property is dead, diseased, or posing a danger to people or structures nearby, it may be necessary to remove it. This process can be tricky, but professional arborists know how to do it safely and effectively. However, it is also important to prepare your property for removal, and there are some steps you can take that will help make things go more smoothly.
The first step is to clear the area around the tree. The arborist will need enough space for the rigs and equipment used during the removal. This means removing outdoor furniture, vehicles, fire pits, lawn decorations, and anything else that falling branches or trunk sections could damage. Mark any underground utilities, like gas or water lines, is also a good idea so the tree removal professionals will know them.
Another step to take before the removal begins is to prune any limbs that are not needed. This will help reduce the tree’s weight, making it easier for the arborists to cut them down. It is also a good idea to fertilize the soil around the old tree’s roots before removing it. This will help ensure that the soil will be rich and full of nutrients after the removal.
Finally, informing your neighbors about the upcoming removal is a good idea so they can be prepared for any noise or traffic during the process. This is a simple gesture that can help avoid any potential issues. It is also a good idea to clear a path for the workers to access their trucks and other equipment.
While it’s typically best left to professionals, people with proper equipment and experience can remove a tree. However, this job requires specialized equipment and advanced safety knowledge. It is also important to consider several factors, such as the size and location of the tree and the surrounding area. If a tree is located near a house or power lines, it may be more challenging to remove.
Before removal begins, a professional arborist should examine the tree and the surrounding area. This will help determine whether the tree is worth saving or should be removed completely. They will also be able to give you an idea of how long the process will take. If you hire a tree service, ensure the company has the required certifications and insurance. This will protect you in the event of an accident or property damage.
Once the tree is removed, it’s important to clear the area around it. This includes clearing away broken branches, twigs, or debris from the ground and ensuring enough room for the tree to fall in the desired direction. Having the area cleared at least twice as wide as the tree’s height is a good idea.
Before the work begins, marking where the tree will fall using rope or another method is a good idea. Watering the soil around the tree’s base is also a good idea, as this will soften it and make it easier to dig out the roots later.
When it comes to removing a tree, a proper cut is essential. Not only does this ensure the tree falls correctly, but it also makes the stump and roots easy to remove. Before cutting a tree, ensure you have the right equipment, including safety gear like gloves, goggles, and a helmet. Having an emergency plan in case something unexpected happens while you work is also a good idea.
Next, you’ll want to assess the situation and decide how to have the tree fall. This is important because if a tree leans to one side, it’s more likely to fall that way when you cut it. Ensure your direction will not hit a home, vehicle, fence, pool, electrical line, or any other structures or objects in your yard. Finally, consider the size of the tree and whether or not it has a limb or branches near anything that could be damaged during the fall.
To determine the best way to cut a tree, it’s recommended that you start at a high point and make an angled cut into the trunk. The cut should be at a 70-degree angle and in the direction you want the tree to fall. It’s important to leave a hinge at the end of this cut, which should be about a quarter of the trunk’s diameter. This is where you’ll drive the wedge to cause the tree to fall. Depending on the situation, you may have to do this multiple times to bring the tree down in sections. Hiring a professional is a good idea if you need more confidence to handle this process.
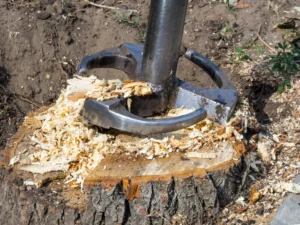
Once you’ve cut down the trunk and determined there is no further use, the next step is to get rid of the stump. Depending on your preferences, this can be done by physically digging it up or using chemicals to kill it and its roots. There are pros and cons to each method. The physical option is more labor-intensive and can require heavy-duty equipment or brute force. The chemical method is less work but can take a while to see results.
If you decide to dig up the stump, it is best to stay away from the center of the stump and dig out a two to three-foot radius around it. This will give you the space needed to expose the largest roots. Dig around the stump using a shovel, removing the dirt and exposing any smaller, hidden roots. Once the larger roots are exposed, it will be much easier to rip them out of the ground.
Alternatively, you can pour potassium nitrate into the hole left by the stump and let it do its job. The nitrate should take about four weeks to completely rot the stump and make it soft enough to remove. Once the stump is corrupted, you can use an axe or a hatchet to chop it up and remove the remaining pieces. Once the stump is removed, it’s important to fill in the hole with loam or sawdust so that it doesn’t sink in the future.
Another method is using a stump grinder, which can be costly and require special training. You can also use herbicides to kill the stump and roots, which should be avoided as it can harm the surrounding vegetation. If you decide to use herbicides, follow all proper safety precautions and use them only in areas where the public can’t access them.